Replicating Notion's tables with a couple of Markdown files and Obsidian plugins
- Date_published:: 2021-04-25
- Publication:: input.sh
- URL:: Wayback
- License:: CC BY-SA 4.0
Tired of Notion's overall sluggishness, I've switched my note-taking to Obsidian about a year ago. One thing I was missing for a long time was the ability to write tables. With the latest third-party plugins for Obsidian, I'm happy to say I'm able to re-create Notion's table functionality, using nothing but Markdown files under the hood.
Consider it outdated, I've probably changed my mind since.
Short Obsidian pitch
In case you're not using Obsidian, here's a quick pitch on why you should:
- It's a free (for non-commercial purposes) cross-platform tool. Mobile apps are in private beta at the time of writing.
- Your notes are kept locally in Markdown files, ensuring you'll have access to them even if Obsidian goes out of business in the future.
- You can sync your notes using any cloud software (I prefer Nextcloud).
- Plenty of first- and third-party plugins make it very extensible.
- Active community of Obsidian users helping each other and sharing things they've achieved with it.
- Ability to link between the notes and visualising those connections with pretty graphs.

A graph of my notes.
Examples
Before I go any further, here's some examples of what I've achieved:
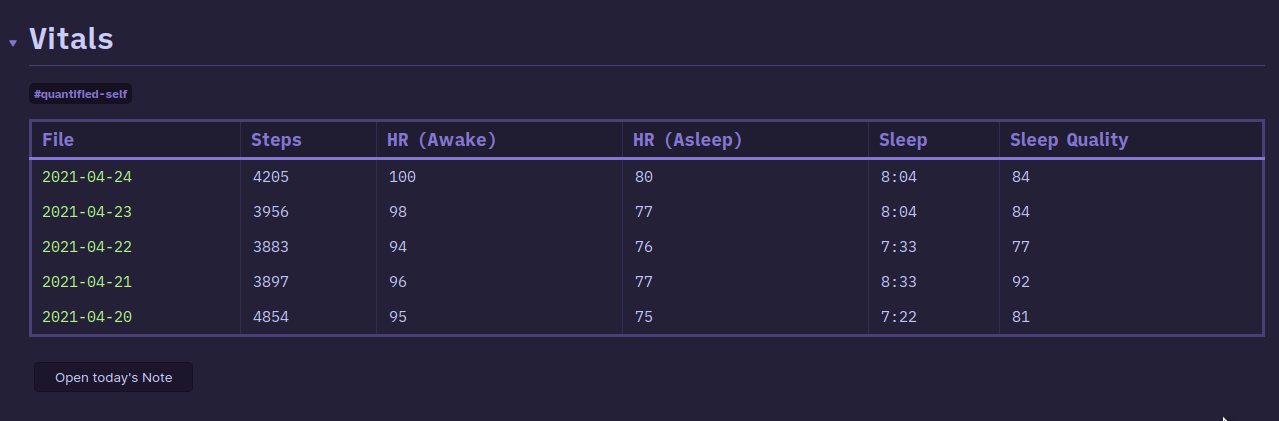
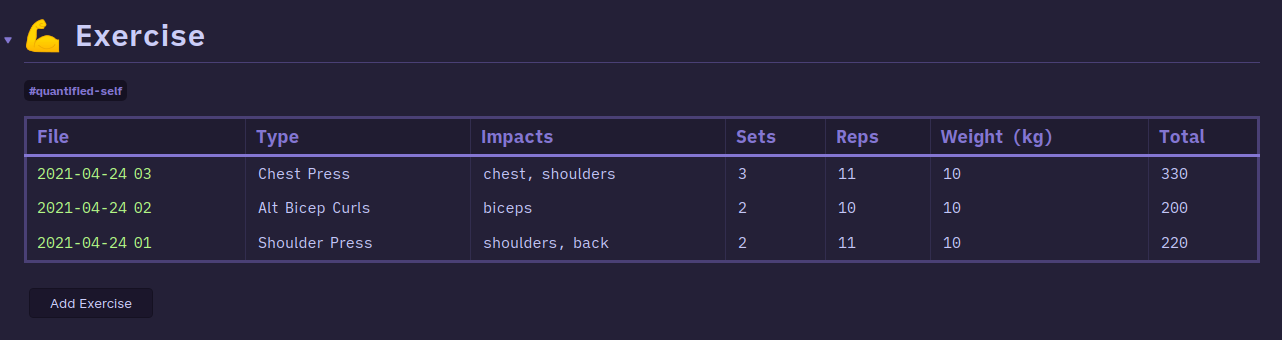

Some examples of possibilities.
Plugins
To achieve that, I've used a combination of three plugins:
- Templates plugin to create templates for new table rows.
- shabegom/buttons to create "new row" buttons.
- blacksmithgu/obsidian-dataview to create database queries.
Dataview is awesome
With the dataview plugin, I can create queries that will filter through my Markdown files. At the moment, it supports two views: lists and tables.
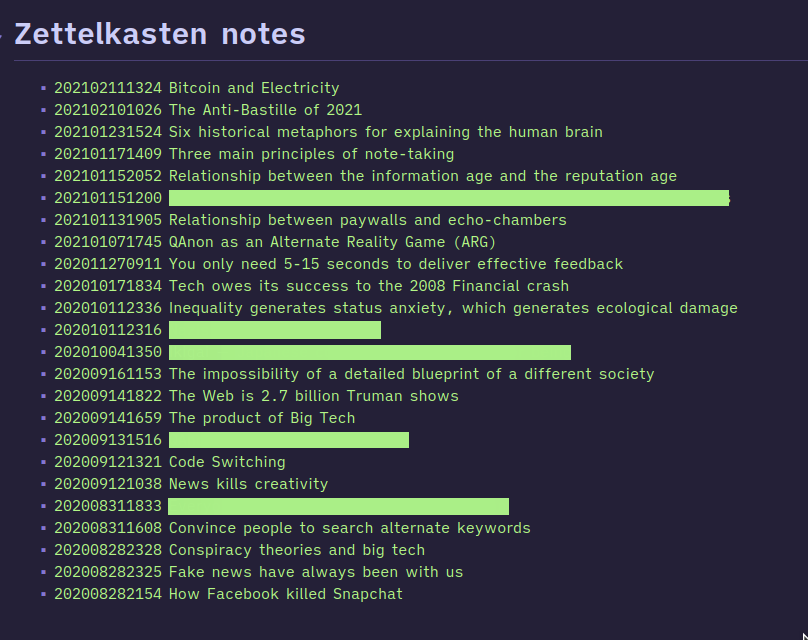
Querying Markdown files into lists
The basic syntax is very easy. For example, to list every Markdown file in a folder called "Climate Change", I'd simply do:
{ .block-language-dataview}
If I wanted to use tags instead of folders, I could achieve the same like this:
{ .block-language-dataview}
From there, I can mess around with the results by adding additional lines. Examples:
- Exclude files whose names contain a certain string:
where !contains(file.name, "--") - Sort the results by file name:
sort file.name asc - Put the last created files on top:
sort file.ctime desc(I can use.mtimeto sort by last modified) - Limit the number of results:
limit 10
Querying Markdown files into tables
An even more powerful way of querying Markdown files is into tables. A simple example will looks like this:
| File | file.ctime |
| ---- | ---------- |

{ .block-language-dataview}
In the first line I've specified the columns I want (above: creation time), and in the second one I tell it where to look (above: folder named "Climate Change"). Queries I've mentioned previously (where, sort, limit, and similar) also work here.
Creating custom columns
To go beyond that, I define custom columns. There are two ways of doing that.
First way is to utilise metadata at the beginning of the note:
---
column: value
---
The second way is to add data directly to the note:
column:: value
These two approaches have slight differences:
- Metadata is not visible in preview mode, data within the content is. Combining the two methods gives additional flexibility.
- Data within the content supports backlinks and auto-updates if you rename a note you've linked to.
Whichever option I choose, my query only needs slight modification to display it. Instead of table file.cname, I do table column, and I'm able to see the values stored in the column variable for each file.
Adding new rows
With basic queries in place, I extend that by creating new notes with a click of a button. To do that, I use a combination of the other two plugins (buttons and templates). Here's an example of a button:
```button
name Add Book
type note(Book/New) template
action Book
class dataview-button
```
Line by line explanation:
- Button always starts with a
name, which is a label displayed on the button. - I define the
typeas a new note from a template. I specify the location where the note should be created in brackets. - With the
actionline I specify the template I want to use. - I add a class to the button, making it easy to style it with some CSS.
Binding it all together with templates
Similarly to Notion's tables, when I use a button to create a new row, I want to have that note pre-populated with variables. This is where templates come in. For example, this is my current book template:
---
Author:
Pages:
Fiction:
Priority:
Rating:
date_finished:
---

#tags
Clicking on a new row will create a new note with that content added. Then I just need to assign values to those variables:
---
Author: Jillian C. York
Pages: 427
Fiction: ✘
Priority: 2
Rating:
date_finished:
---

#to-read

- Publisher:: Verso
That's it! My table will update itself. I have a couple of tables that look at specific tags based on the status of the book (reading, completed, to-read), and I can pick and choose which fields to display:
date_finishedis only relevant for the books I've completed.Priorityis only relevant for the books on my to-read list. The lower the number, the higher the priority, and I can move the books up or down the list by changing that value.Progressis a percentage of the book I've completed. Only useful for books I'm currently reading.
The possibilities are endless️
For more inspiration, here are some examples shared on the forum:
- Exercise and workout workflow by arminta
- Task and project workflow by arminta
- Daily and weekly reviews workflow by arminta
- University assessments by SkepticMystic
- D&D campaign by ebullient
Unless specified otherwise, this work is licensed under a Creative Commons BY-NC-SA 4.0.